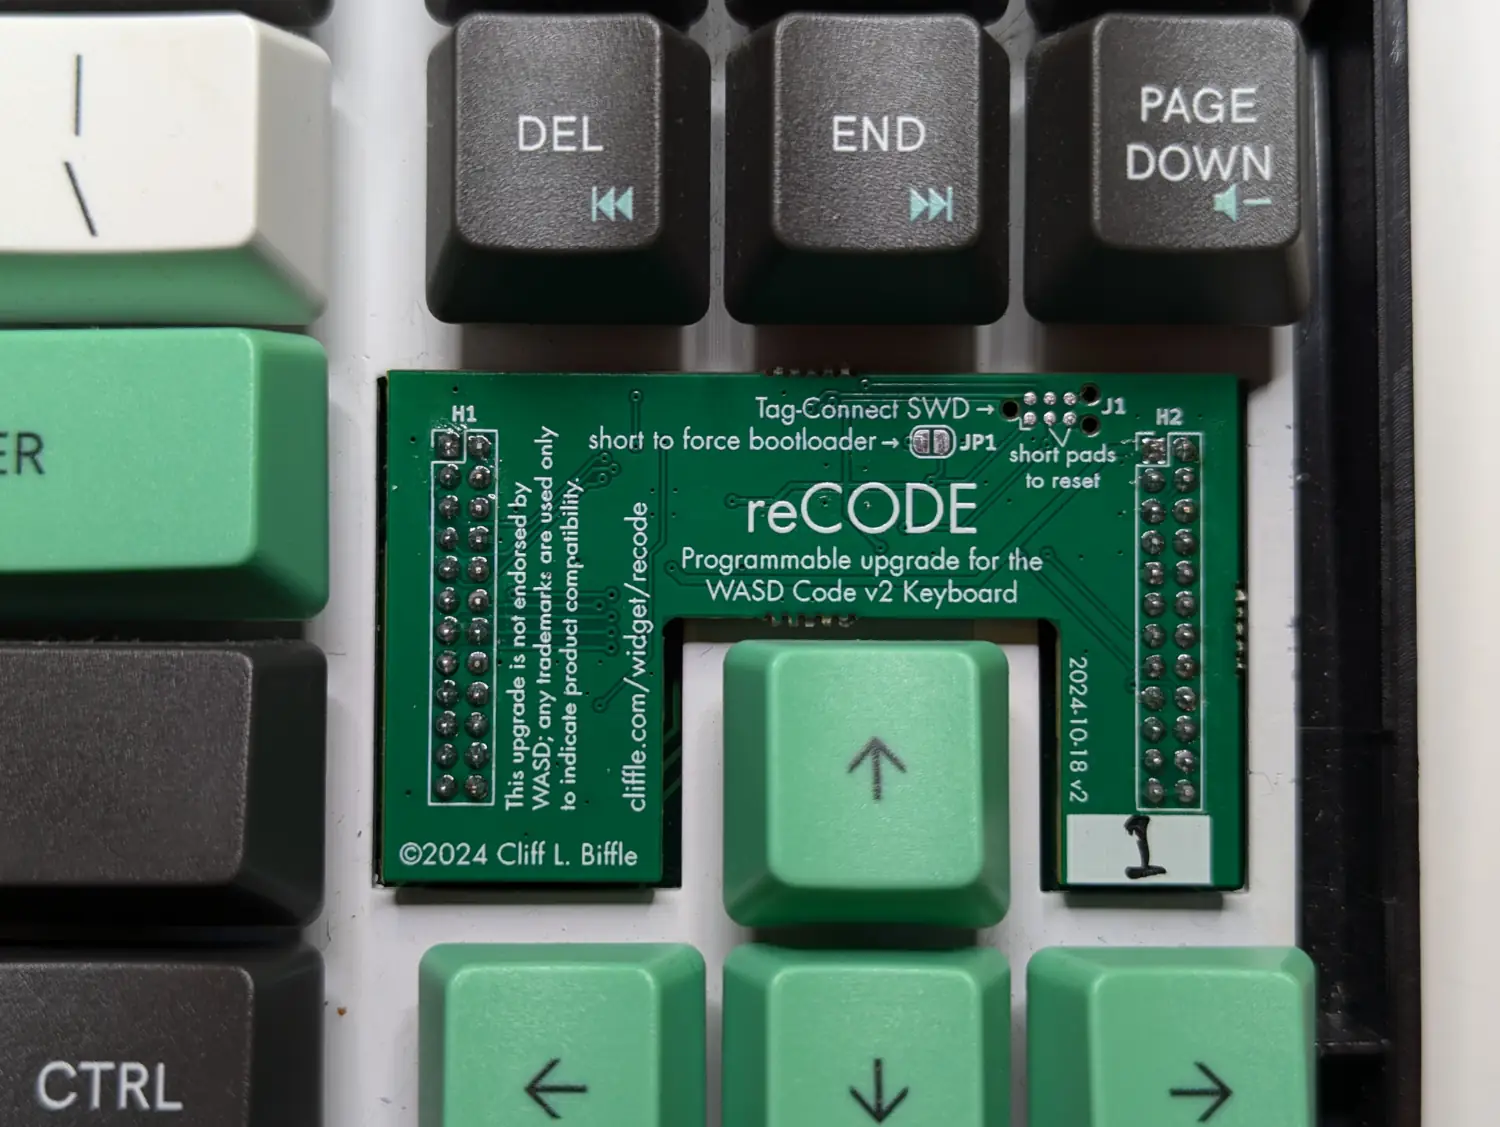
reCODE: QMK for the WASD CODE v2
Breathe new life into an old favorite!

The WASD CODE v2 keyboard was lovely, but its fixed-function keyboard controller limits its programmability and compatibility. WASD’s answer to this was to end-of-life it and release the v3. :(
But your CODE v2 is still a perfectly good keyboard! By installing this module, you can make it run the latest programmable keyboard firmware — either my custom Rust firmware, or QMK. :D
I have a similar upgrade board for the CMStorm Quickfire Rapid keyboard, too!
What it’s for
I use a WASD CODE v2 as my daily-driver in my home office, and was frustrated that there was no upgrade path that didn’t involve throwing the keyboard away. Once I noticed that the keyboard’s control IC is on a riser board … well, it was clear what I had to do.
The WASD CODE v2 allows some basic configuration using the DIP switches on the back, but what if you want more?
- Enable full N-key rollover when using USB! (The original only supported it on PS/2.)
- Brighten, fade, or pulse the backlight!
- Change the keyboard layout in arbitrary ways that follow you from computer to computer!
- Enable OS detection to automatically choose a Mac or PC layout!
- Or any of the other laundry list of features supported by QMK
Compatibility and Disclaimers
I strongly recommend following the “checking compatibility” instructions in the manual before buying. There are two versions of reCODE depending on the size of your keyboard, make sure you select the right size!
reCODE is based on reverse engineering of a proprietary product, and while I’ve made a best effort to ensure compatibility (and have not so far heard any reports of incompatibility), it’s possible that not all WASD CODE v2s are alike under the hood, and that this is not compatible with your keyboard. Even if it fits in the controller slot, it’s possible that different batches of the CODE keyboard have electrical differences. Like any modification that involves opening your keyboard and altering its electronics, it’s possible this may damage your keyboard. I can’t be responsible for replacing your keyboard (this is a hobby project for me).
PCB may have slight differences in appearance from the photos above.
Product status
I’ve been using a version of this as my daily-driver since 2020. The boards I’m distributing are a newer revision that fixes the problems with my original prototype. Quantity is limited, but if there’s interest I can make more.
Upgrading your keyboard
To install this module you will need basic through-hole soldering skills. The process is straightforward, and is described in considerable detail in the user manual. Here’s a summary:
- Solder the (included) pin headers into place on either side. (I’ve already soldered all the surface mount bits for you.)
- Remove all the screws from the back of your keyboard. (On the tenkeyless version, there is a single screw under the meaningless warranty sticker. The fullsize has a total of three.)
- Use a spudger or sturdy fingernail to pry the top plastic case off by working around the seam.
- Gently lift the factory controller PCB out of its position over the cursor keys.
- Put reCODE in its place.
Replacing the firmware
Using the default QMK firmware, you can put the keyboard into DFU mode by holding ESC while plugging it in. At that point you can flash a different build of QMK, or a copy of my Rust firmware, if you’re into that sort of thing. Have fun, it’s almost impossible to brick reCODE with a firmware update. The user’s manual describes this in more detail.
My QMK support for this module is on a branch in my fork). I’ve gone to some lengths to ensure that the QMK port has exactly the same behavior as the stock firmware, down to the configuration DIP switches. If you would like to build it yourself, there are instructions in the manual.
Documentation and Support
- User Manual
- QMK source
- Schematics:
- Revision B (Tenkeyless only)
- Revision C (universal)